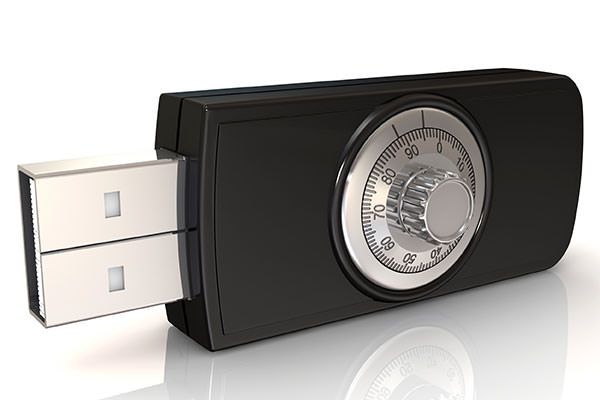
We can lock our phones, our cars, and our computers, but did you know that you can secure your flash drive, too? USB flash drive encryption is a simple way to ensure your private data remains protected. Encryption is a method for restricting access to your flash drive either by software or hardware installed on the drive that requires a key to unlock.
The function of many USB drives in today's Internet centric market is to offer cold data storage, which does not require an internet connection to provide access to your data and is generally thought of as more secure from virtual attacks. Flash drives are attractive options for people who need ready access to their business documents on the go without an internet connection or need sizable data capacity on hand.
The unfortunate reality of flash drives is that they can be physically lost or stolen, and so it is therefore extremely important to protect your valuable information. There are plenty of anecdotes of foolish travelers who put their whole lives on one drive only to lose it and expose all their sensitive information.
Hardware vs. Software Encryption for your USB Drive
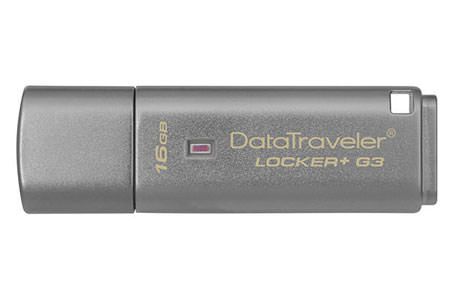
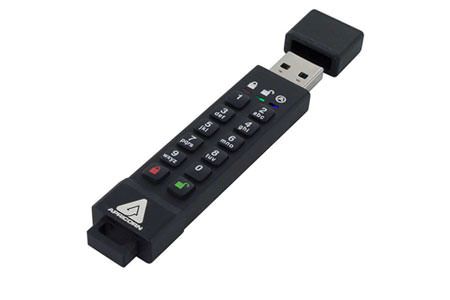
You can easily buy USB drives with encryption hardware; these drives utilize a chip that offers automatic and invisible encryption. Quite often these drives utilize a physical pin pad to enter a pin code and many come with other security features such as automatic overwrites in the event of too many pass code errors. Due to these factors, they tend to be on the higher side of pricing compared to normal drives but like most popular tech, prices are falling. Amazon offers a simpler model from Kingston at 3.0 USB speed for only $24 but you can easily see fancier and more luxurious models and brands rocketing upwards to around $90.
Unfortunately, hardware encrypted USB drives are not immune to failure. Most large brand name OEMs, including SanDisk, Kingston, Verbatim, and Trek have turned out drives that have failed security standards. To our knowledge, these security flaws have been remedied.
On the other hand, software encrypted USB drives are as cheap as whatever drive you use is. Encryption software is inexpensive, if not free, and often is included with desktop platforms. They perform just as well as hardware encrypted drives do, provided the platform you plug into supports the software installed on your drive and you aren't careless with your pass code. The downside is that it takes a little bit of time to encrypt them yourself, you can't use it on a computer that doesn't use the same software, and if you're not tech savvy you may not feel confident doing it yourself. Our included steps to encrypting your own USB drive are just the boost you need!
In the end, both options offer security without reducing functionality of your drive. It becomes a matter of what works best for you and your needs. Software encryption is cheaper and often performs just as well but is prone to potential problems like software issues and user error. Hardware encryption is less prone to user error and is often more reliable in performance though expensive in comparison.
If you've decided to go the software route, we've included some handy steps to creating your very own encrypted USB drive below.
Steps
There are many ways how to encrypt a flash drive yourself but they all essentially boil down to the same steps: installing software, enabling it, and locking it with a decryption code. We've included steps for both PC and MAC computers.
Windows
For a PC running Windows, we'll show you how to use BitLocker (included software in Windows operating systems 7 and above) and another popular program, VeraCrypt. You will need: A blank USB drive, a computer with BitLocker installed, and some time.
How to encrypt a USB drive in Windows (7-10) using BitLocker:
- Connect blank USB drive; if it's not blank, then move data from it
- Open your File Explorer and find your USB drive on the left (usually named after manufacturer).
- Right click on your drive and choose "Turn on BitLocker"
- BitLocker will launch and ask you to "Choose how you want to unlock this drive," check "Use a password to unlock the drive"
- Enter a strong password twice
- Next, you will be asked "How do you want to back up your recovery key?" Either save to a file on the computer you're using or print it (you can do both)
- Next, choose "Encrypt used disk space only" (if you haven't removed files like in step 1, choose "Encrypt entire drive")
- Now choose "Compatible mode" so you have the maximum compatibility with other devices and computers
- Select "Start encrypting"
- Do not remove your drive during this process. It may take some time to encrypt. You will get a message stating encryption is finished
When you connect your flash drive again, you will be prompted to enter the password you chose.
Note: You will not be able to use this drive on a computer that does not have BitLocker installed.
To encrypt using VeraCrypt:
- Download VeraCrypt from their official website
- Run the program, hit "Install" and then "Next"
- Hit "Okay" to complete installation when prompted
- Connect blank USB drive
- Launch VeraCrypt and click "Create Volume" to initiate the Volume Creation Wizard
- Select "Encrypt a non-system partition or drive" and then "Next"
- Under Volume Type select "Standard VeraCrypt volume" and then "Next"
- In Volume Location window, click "Select Drive" and choose your USB drive and then "Okay"
- Click "Next"
- In Volume Creation mode window, select "Create encrypted volume and format it" and then "Next" (If you have data on the drive already, click "Encrypt partition in place" instead but this is much slower)
- On the Encryption Options page, choose the algorithm and Hash algorithm that you want. If you're not sure, choose AES for encryption algorithm and SHA-256 for the Hash algorithm then click "Next"
- On the Volume Size window, simply hit "Next" (you can't change the container size!)
- On the Volume Password window, input a strong password twice and hit "Next"
- On the Volume Format window, randomly move your mouse until the progress bar turns green; then click "Format"
- A warning window will pop up; click "Yes"
- The drive will now begin to format and encrypt; once finished a notification window will pop up to let you know; hit "Okay" and you're done!
Note: You will not be able to use this drive on a computer that does not have BitLocker installed. ALSO Windows may believe that your drive is damaged and ask you to format the drive; ignore this warning.
How to encrypt a USB drive on Mac
Like PC, Mac generally includes encryption software in their desktops already so you will not have to download another software program.
- Insert USB flash drive and move all files off drive into safe location, like your desktop
- Open Finder and look for Disk Utility under Applications
- Choose your device from the left hand list
- Go to the Erase tab, choose "Mac OS Extended (Journaled)" in the Format box; choose a name
- Click on Erase button to delete all data on drive
- When completed, open File menu, click on New and then "Blank Disk Image"
- The save location should be your USB Drive name
- Select a size closet to the capacity of your USB drive but make it smaller. Then, choose either "128 bit" or "256 bit" AES encryption. With Partitions, choose "Single Partition"
- Go to Image Format and click on Read/write disk image; Click "Create"
- Input a strong password or use the password generator to create one for you (the key icon). You can also set a password hint. Keep copy of password safe elsewhere
- Copy files to drive and put them on the DMG disk image file. They will not be password protected if they are not in that file.
How to encrypt a USB drive using Linux
Like Mac and Windows, Linux uses third party tools that are often already available on your computer. To encrypt a drive using a Linux computer, we'll show you to how use Disk Utility. Not all systems have Disk Utility (or even a GUI) installed; make sure you have it first before proceeding.
- Connect your flash drive and copy your data elsewhere. Your drive should be completely wiped.
- Go to your dashboard Home and enter "Disk Utility"
- Select your USB drive
- Click "Unmount Volume" so you can format before encryption
- Click "Format Drive" and wait
- Click "Create Partition" and either encrypt the full disk or create a portion
- Check the "Encrypt underlying device" give it a name and then "Create"
- Next, create a pass code; click "Create"
- Disconnect your USB drive; when you connect again a dialogue box will appear asking for your pass code
Note: You will only be able to use this encrypted USB drive on Linux computers!
Additional USB Drive Security Tips
Security and protection of your sensitive data should be your top priority. Here are some more security tips regarding your encrypted USB drive:
- If you want to re-use your drive for something else not so sensitive, make sure to erase all data once you are done using it for secure purposes
- Keep your encryption key and encrypted drive separately—and of course, don't lose the key!
- Keep an emergency backup decryption key
- If your drive malfunctions and you cannot fix it, it's best to physically destroy the drive in such a way that it cannot be repaired and infiltrated
Obviously, this last tip is aimed at users who store extremely sensitive information on their drives, but never the less, it's better to practice safe data handling regardless of the content of your drives. With these security tips and a well encrypted USB drive, you can finally travel with the peace of mind that your information is protected.